GeoWave EMR Quickstart Guide: Spatial Join Jupyter Notebook
Assumptions
This document assumes you understand how to create and configure an EMR cluster for GeoWave, and you understand the basic cluster setup for the jupyter notebook examples. If you need more information on the steps involved in setting up a cluster to support GeoWave visit:
Configuring Spark
To better configure Spark for our demo we use an option provided by AWS to maximize the memory and CPU usage of our Spark cluster called maximizeResourceAllocation. This option has to be provided at cluster creation as a configuration option given to Spark. For more information on how to set this option visit Configuring Spark.
|
Setting this option on some smaller instances with HBase installed can cut the maximum available yarn resources in half (see here for memory config per instance type). AWS DOES NOT account for HBase being installed when using |
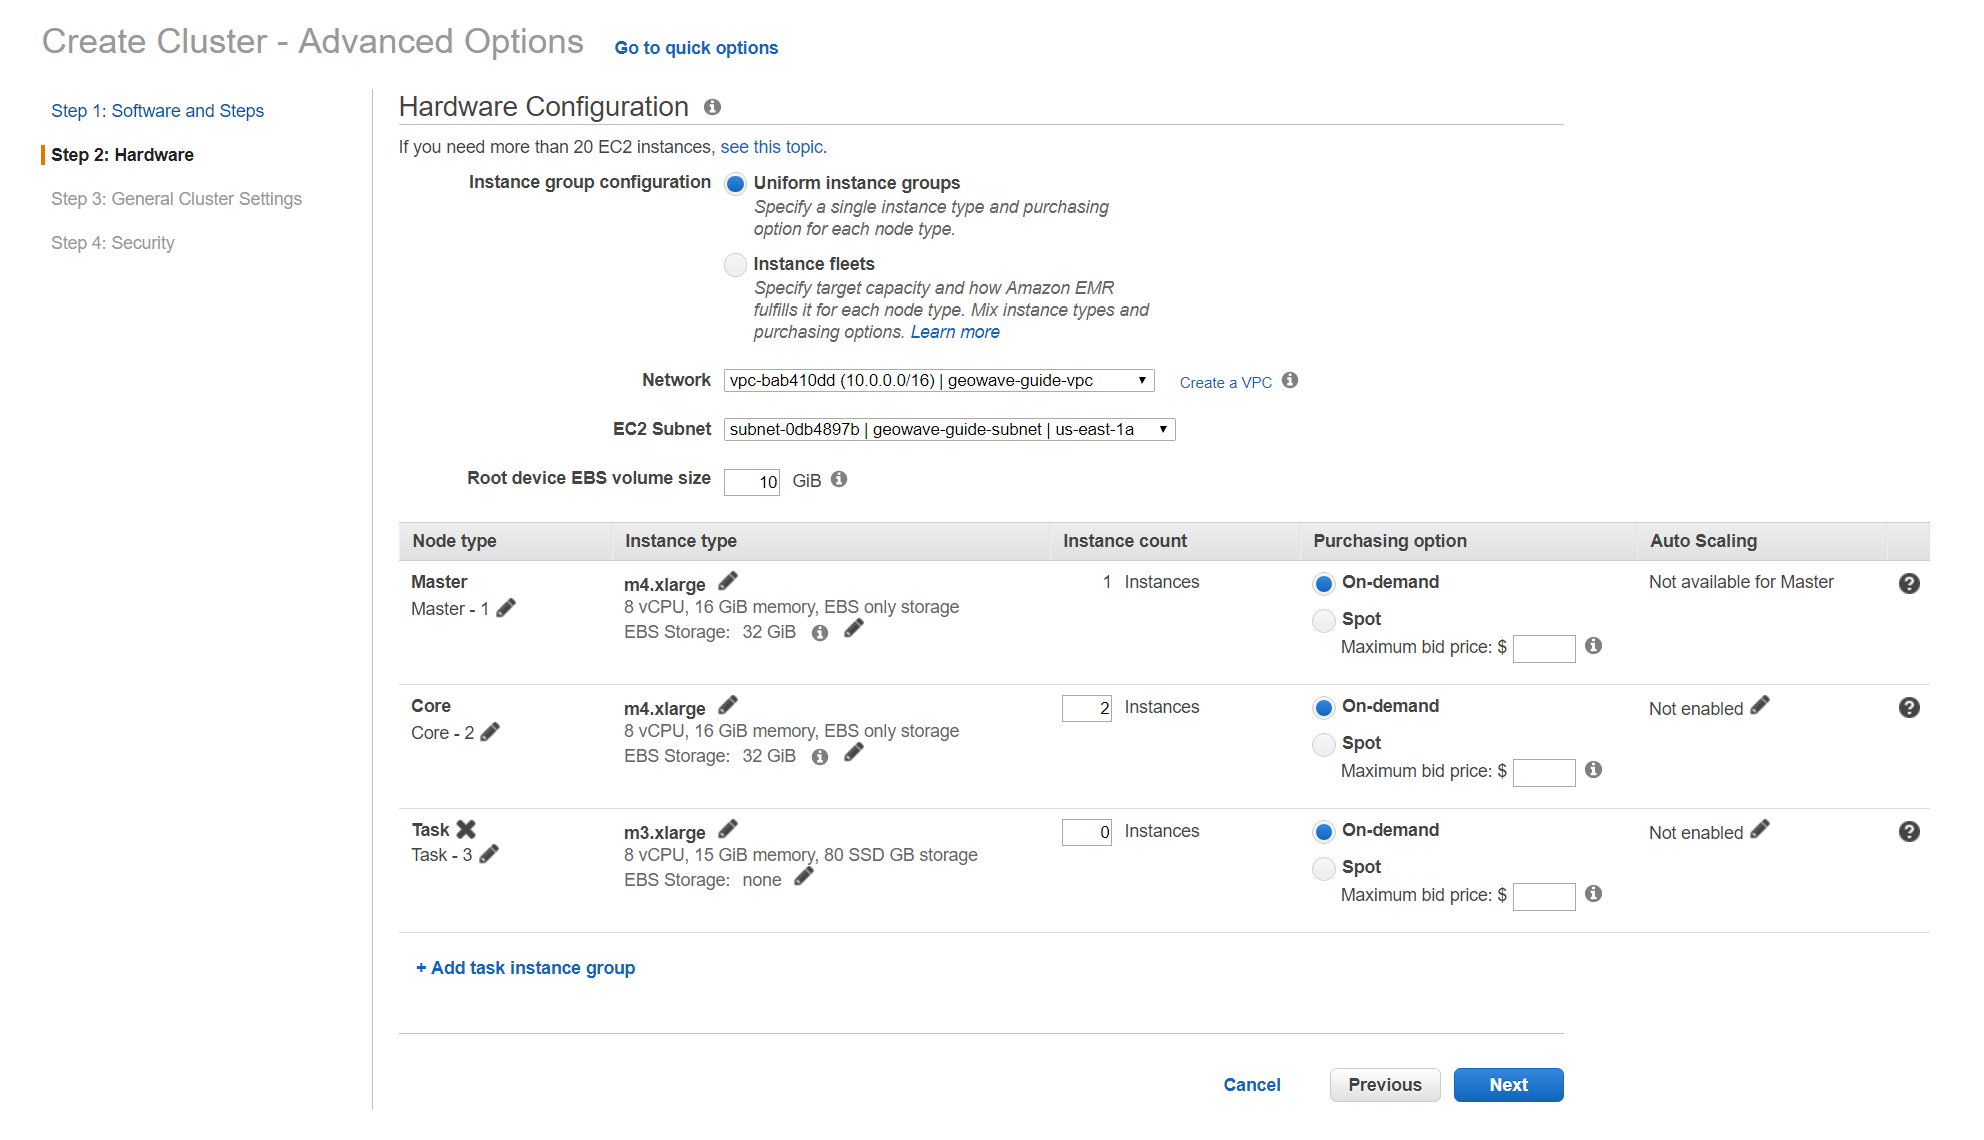
Recommended Hardware settings
The current implementation of the join is rather unoptimized as it considers the worst case scenario in terms of setup logic for each dataset (dynamically generates indices for each set). This requires more hardware resources than the other demos, so you will need to modify the hardware specifications of your EMR cluster to at least the minimum required settings specified below to run successfully.
Connect to the Notebook Server
After your cluster has been created and is in the Waiting state, you are ready to connect to the notebook server and run the demo:

-
Use the master public dns of the cluster like below in your browser to connect to the notebook server.
{master_public_dns}:9000 -
Enter the default password
geowaveto gain access to the notebooks. -
Then simply select the demo notebook you wish to run and follow the instructions in the notebook to proceed through the demo. You can run each cell of the notebook by pressing [SHIFT + ENTER] while a cell is in focus.
Appendices
Modifying Spark Settings on Jupyter Kernel
Our bootstrap scripts setup the Jupyter kernel to use yarn by default, and other spark configuration settings through the kernel.json file for the kernel itself. If for any reason you would like to change these settings, you can do so by modifying the kernel.json once you are connected to the cluster.
-
SSH into the emr cluster
-
Open the
kernel.jsonfile in your favorite text editor (vim, vi, nano) found at the following location-
/home/hadoop/.local/share/jupyter/kernels/pythonwithpixiedust22/kernel.json
-
-
Modify
PYSPARK_SUBMIT_ARGSto contain whatever settings you need for spark. -
Restart the Jupyter Kernel (if running), or your settings will be applied the next time the kernel loads.
Restarting the Jupyter Daemon
The Jupyter notebook server is launched at cluster creation as a Upstart service. If Jupyter should stop working or need to be restarted after the cluster has been created, you can do so by following these steps.
-
SSH into the EMR cluster
-
Run the following commands
sudo stop jupyter
sudo start jupyter