GeoWave EMR Quickstart Guide: Zeppelin Notebook
Assumptions
This document assumes you understand how to create and configure an EMR cluster for GeoWave. If you need more information on the steps involved in setting up a cluster to support GeoWave visit:
Configuring Spark
To better configure Spark for our demos we use an option provided by AWS to maximize the memory and CPU usage of our Spark cluster called maximizeResourceAllocation. This option has to be provided at cluster creation as a configuration option given to Spark. For more information on how to set this option visit Configuring Spark.
|
Setting this option on some smaller instances with HBase installed can cut the maximum available yarn resources in half (see here for memory config per instance type). AWS DOES NOT account for HBase being installed when using |
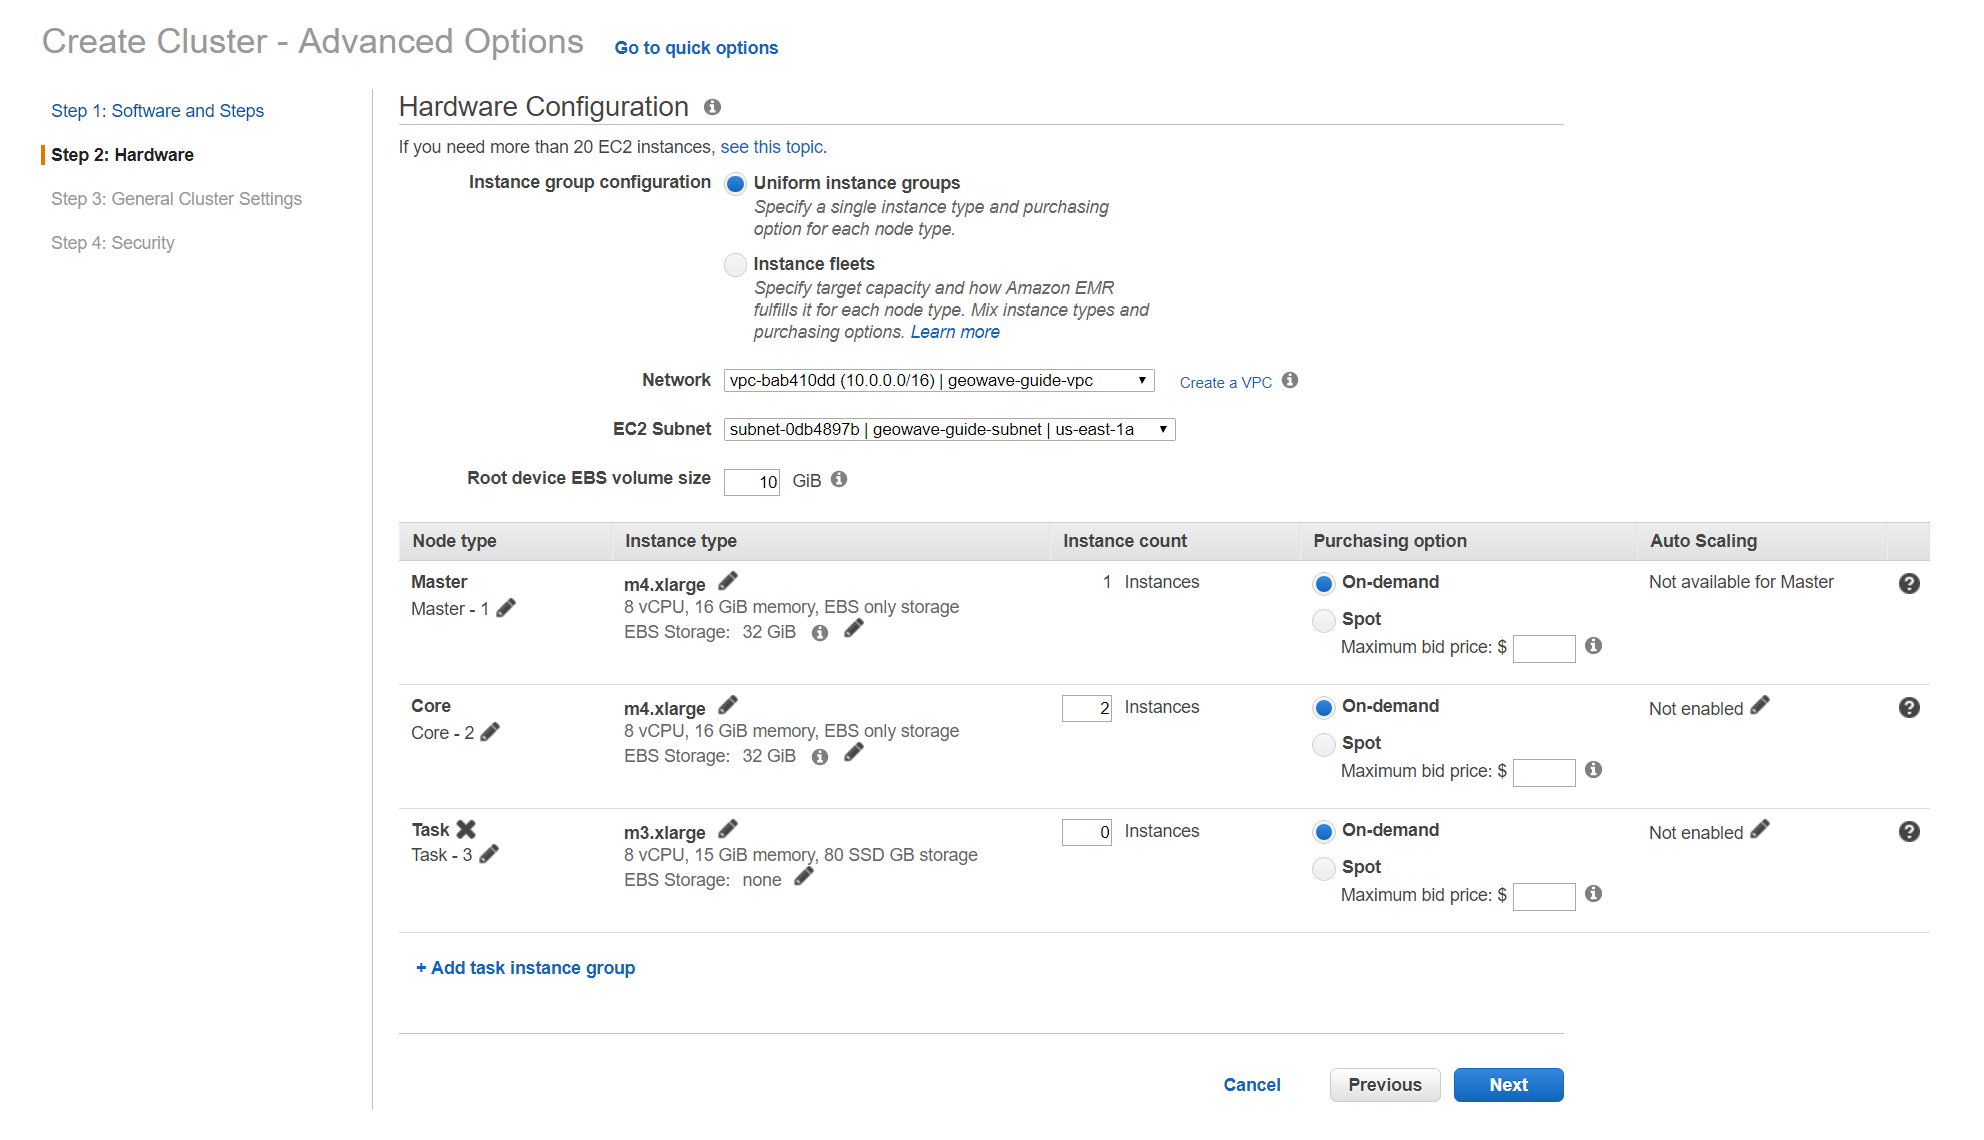
Recommended Hardware settings
Currently, there are two notebook demos using differently sized data sets. If you wish to run either Zeppelin notebook demo you will need to modify the hardware specifications of your emr cluster to at least the minimum required settings specified for the demos below.

Configure Zeppelin
To properly run and access GeoWave classes from the Zeppelin notebook we must configure the Zeppelin installation on EMR before running. We’ve created a bootstrap script to do that for you that can be found here:
-
Zeppelin Bootstrap: http://s3.amazonaws.com/geowave/2.0.1/scripts/emr/zeppelin/bootstrap-zeppelin.sh
This bootstrap script will configure Zeppelin to access GeoWave classes, install the correct GeoWave JAR file (more information in appendices), and setup other spark settings for Zeppelin. This script needs to be run as a bootstrap action when creating the EMR cluster.
|
It is recommended to use the Accumulo bootstrap script as the first bootstrap script to setup your cluster. Doing so will let you use both HBase and Accumulo as long as you select HBase as a default application (backed by S3) to add to your cluster from AWS.
For more information on setting up bootstrap actions visit this AWS Environment Setup Guide |
Connect to the notebook server
After your cluster has been created with the script above and is in the Waiting state, you are ready to connect to the notebook server and run the demo:

-
Use the master public dns of the cluster like below in your browser to connect to the notebook server.
{master_public_dns}:8890 -
Import the example notebooks into Zeppelin
-
Example notebooks found here
If you want to add a notebook from the url you will need to use the raw file link on github.
-
-
Then simply select the demo notebook you wish to run and follow the instructions in the notebook to proceed through the demo.
Appendices
Restarting the Zeppelin Daemon
The Zeppelin notebook server is launched at cluster creation as a Upstart service. If Zeppelin should stop working or need to be restarted after the cluster has been created, you can do so by following these steps.
-
SSH into the emr cluster
-
Run the following commands
sudo stop zeppelin
sudo start zeppelin
Update GeoWave JAR file
Due to a bug with Zeppelin on EMR a different build of GeoWave using Accumulo 1.7.x must be used on the cluster if you intend to use Accumulo data stores. If you used the bootstrap script to setup the cluster for Zeppelin these steps are done automatically and you do not need to run the following steps in your cluster. If you want to package geowave locally and use that JAR on your cluster follow the developers guide and run the following steps.
-
Run the following command to package the source with Accumulo 1.7.x
mvn clean package -DskipTests -Dfindbugs.skip -am -pl deploy -Pgeowave-tools-singlejar -Daccumulo.version=1.7.2 -Daccumulo.api=1.7 -
Upload the newly created snapshot tools JAR file located in
deploy/target/of your geowave source directory to a s3 bucket accessible by the cluster. -
SSH into the emr cluster
-
Run the following commands
aws s3 cp s3://insert_path_to_jar_here ~/
mkdir ~/backup/
sudo mv /usr/local/geowave/tools/geowave-tools-0.9.7-apache.jar ~/backup/
sudo mv ~/insert_jar_file_here
Following these steps will allow you to maintain a backup JAR, and update the JAR used by Zeppelin. Simply restore the backup JAR to the original location if you encounter errors after these steps. If you were running a Zeppelin notebook before running these steps you will need to restart the spark interpreter to update the JAR file used by YARN.